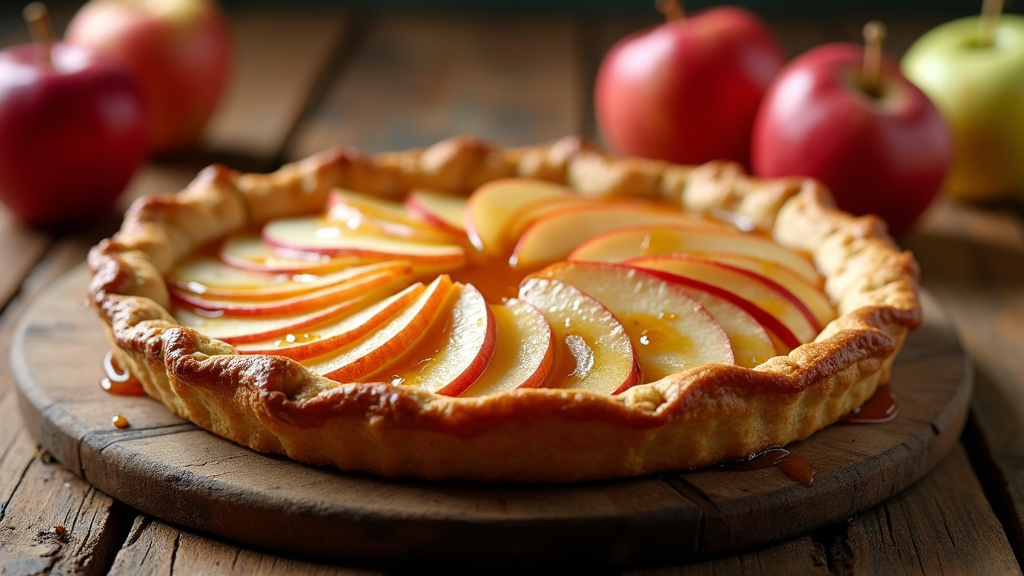
Yo, if you tryna whip up a dessert that got that bomb flavor and style, this Caramel Apple Pie is where it’s at. I’m talkin’ a flaky, buttery crust, apples that hit just right, and a homemade caramel sauce drippin’ on top like it ain’t playin’. Whether you celebratin’ a special day or just feelin’ that relaxed Sunday vibe, this pie be flexin’ in the kitchen and showin’ you how to rock a dessert without any fuss.
Why This Pie Slaps
- Flaky, buttery crust: The dough is straight fire – light, crispy, and melt-in-your-mouth good.
- Homemade caramel sauce: Forget the weak stuff; this caramel is thick, rich, and made from scratch to give your pie that next-level cool finish.
- Perfect apple blend: A mix of sweet and tart apples that hit every spot just right.
- Easy-peasy baking: If you can mix and roll, you already got what it takes to create this masterpiece.
Ingredients
Check out what you need to bring this pie to life. I got the full list for the crust, filling, and that bomb caramel makin’.
For the Crust (Homemade is where the heart is, but you can roll with store-bought too)
- 2 1/2 cups all-purpose flour
- 1 cup cold butter, cubed
- 6 tbsp ice-cold water
- 1/2 tsp salt
For the Apple Filling (Flavor on lock)
- 6 Granny Smith apples (or mix in some Honeycrisp for extra pop)
- 3/4 cup brown sugar
- 1/4 cup white sugar
- 2 tsp cinnamon
- 1/2 tsp nutmeg
- 1 tbsp lemon juice (keeps them apples from turnin’ brown)
- 2 tbsp cornstarch (for that thick, not runny, vibe)
For That Caramel Drip
- 1 cup brown sugar
- 1/2 cup heavy cream
- 4 tbsp butter
- 1 tsp vanilla extract
- 1/2 tsp salt
Step-by-Step: How to Build Your Pie
1. Get Your Dough on Point
First things first, if you rollin’ with homemade crust, toss 2 1/2 cups of flour and 1/2 tsp salt in a bowl. Cut in your cold, cubed butter until it looks like fine crumbs. Slowly add in your ice-cold water one tablespoon at a time. Mix it up until you got a dough that just barely sticks together. Don’t overdo it because we tryna keep it flaky rather than chewy. Wrap it up and let it chill in the fridge for about 30 minutes so it firms up nicely.
2. Prep Them Apples
While your dough is chillin’, peel, core, and slice them 6 apples real nice. In a bowl, toss your apple slices with 3/4 cup brown sugar, 1/4 cup white sugar, 2 tsp cinnamon, 1/2 tsp nutmeg, a splash of 1 tbsp lemon juice, and 2 tbsp cornstarch. Let it sit for 10 minutes so the flavors mix together and the apples get juicy but not too soggy. This extra wait gives your filling a chance to develop a deep and balanced flavor profile.
3. Make the Caramel Sauce
In a medium saucepan over medium heat, combine 1 cup brown sugar, 4 tbsp butter, and 1/2 cup heavy cream. Stir it constantly until it thickens up and becomes smooth—a process that should take about 5 minutes. Once it looks right, stir in 1 tsp vanilla extract and a pinch of salt. Remove from heat and let it cool just a bit; you need that perfect consistency so the caramel drips without overwhelming your pie.
4. Assemble the Pie
Roll out your chilled dough on a lightly floured surface until it’s about a 12-inch circle. Lay it down in your pie pan, smoothing it out evenly over the base. Pack your apple mixture into the crust, making sure it’s spread out nicely. Drizzle half of your caramel sauce over the apples. If you like that extra visual and taste flair, save a bit more sauce to drizzle on top after baking. You can use a full crust cover or get creative with a lattice design. Should you opt for a top crust, press the edges firmly so no caramel or apple juices seep out during baking.
5. Bake That Masterpiece
Preheat your oven to 375°F. Slide your assembled pie into the oven and bake for about 50-55 minutes. You’re lookin’ for a golden, eye-catching crust and a soft, tender apple filling inside. Keep an eye on the edges; if they darken too fast, cover them with some foil to avoid burnin’. The aroma that fills your kitchen as the pie bakes is a sure sign that something really special is cooking up.
6. Cool and Set It Up
Once your pie emerges from the oven, let it cool for at least an hour. I know it’s tough waitin’ when that caramel is all shiny and beckoning you, but this cooling period is very important so the filling sets up beautifully. This waiting time also allows the flavors to blend even more together, making each bite a harmonious mix of sweet and spice. Trust me, patience here is key.
Recipe Tips & Variations
- If you tryna switch things up, mix in a couple different apple types. Combining Granny Smith with Honeycrisp gives you a balanced sweet-tart kick.
- Make sure your butter for the dough stays extra cold. That’s what gives you that bomb flaky texture and keeps your crust light.
- For a bit more spice, try adding a dash of allspice or just a tiny pinch of cloves with your apple filling to set things off in a really interesting way.
- If the crust edges brown too quickly, don’t hesitate to shield them with some foil. You can always take it off later if needed.
- You can prepare the caramel ahead of time and store it in the fridge for a few days. Just warm it up a bit before using so that it flows perfectly over your pie.
Frequently Asked Questions
Q: Can I use store-bought crust for this pie?
A: Yeah, you can. But making your own dough takes this pie from good to legendary. If you aren’t comfortable with the homemade version, store-bought will still do the job though it might not bring the same level up your pie game.
Q: What if I don’t got a pie pan?
A: You can always use a baking dish, but be prepared to adjust the baking time a bit. Just keep a close eye on it and make adjustments as needed.
Q: Can I make the caramel sauce in advance?
A: For sure. The caramel can be made ahead of time and stored in the fridge for up to two weeks. Just reheat it a little before using so that it retains that perfect thick consistency.
Q: How do I know when my pie is done?
A: Look for a golden crust and a soft apple filling. A set caramel topping is another good indicator, but if you prefer a jammy center, you might want to give it a bit of extra time.
Extra Tips for the Perfect Pie Experience
For those who want to take their apple pie game up a notch, consider a few additional tips that can really boost your final result. First, when preparing the apples, try lightly tossing them with a squeeze of fresh lemon juice and a sprinkle of extra cinnamon. This small step not only helps maintain that vibrant apple color but also adds an extra layer of flavor that really makes the filling pop. Spending a little extra time on this step can mean the difference between a good pie and a next-level cool dessert experience.
If you’re feeling adventurous, experiment with adding a handful of chopped walnuts or pecans to the apple mixture. The crunch and nutty flavor will contrast beautifully with the soft apples and smooth caramel. Not everyone loves nuts in their dessert, so this is totally optional, but it’s worth a try if you’re looking to mix in some variety. Also, consider sprinkling a bit of coarse sea salt over the caramel drizzle just before serving. This creates an unexpected but delightful burst of flavor that elevates every bite.
Another trick is to let your pie sit out for a few extra minutes after it’s cooled. This resting period allows the caramel to thicken further and the apple juices to settle, ensuring cleaner slices when you serve it. Trust me, the end result is a visually impressive and deliciously balanced dessert that not only tastes amazing but also looks really inviting on your table.
Notes on Serving and Storage
Once you pull that pie out of the oven and let it cool down, serving it warm is where the magic happens. Consider pairing a warm slice with a generous scoop of vanilla ice cream or even a light drizzle of cream for that extra indulgence. The contrast between the warm, tender apples and the cold, creamy topping creates a flavor combo that’s hard to beat.
If you have leftovers, store your apple pie loosely covered at room temperature for up to two days, or refrigerate it to enjoy later on. When you’re ready to reheat, pop a slice in the microwave for about 20-30 seconds; just enough to bring back that delightful warmth and gooey caramel texture.
Wrapping It Up
Bottom line: this Caramel Apple Pie isn’t just a dessert—it’s an adventure in flavor. From the first step of mixing up the dough to the final moment when you take that first bite, every part of the process is really important in creating a dish that shines in both taste and presentation. Whether you’re a kitchen veteran or just starting to experiment, this recipe is built to impress. So, get in there, bake that bomb caramel apple pie, and enjoy every drippin’ bite with your crew. Your taste buds are in for a treat, and every slice tells a story of creative cooking done right.
Now that you’ve got all the details in place, it’s time to roll up your sleeves and get making. From prepping the ingredients to watching the pie develop its golden crust in the oven, every minute you invest will be repaid in the form of a mouthwatering dessert that everyone will rave about. Enjoy the process, share the joy, and most importantly, savor every delicious moment!
